> For the complete documentation index, see [llms.txt](https://ttezcan.gitbook.io/lectures/llms.txt). Markdown versions of documentation pages are available by appending `.md` to page URLs; this page is available as [Markdown](https://ttezcan.gitbook.io/lectures/all-lectures-and-labs/r-lab/lab-resources/how-to-open-and-use-r-script-files-in-rstudio-cloud.md).
# How to open and use R script files in RStudio Cloud
## Video guideline:
{% embed url="" %}
Make sure you have a RStudio Cloud account. Otherwise, get one and install all the packages. [See this guideline](https://ttezcan.gitbook.io/lectures/all-lectures-and-labs/r-lab/lab-resources/how-to-create-rstudio-cloud-account-and-installing-all-the-packages).
## Textual guideline:
1. Open [RStudio Cloud website](https://posit.cloud/) and log in. Click "RStudio labs" under "Your content."
2. Download the R script file you need:
1. Go to Canvas ➜ Resources module page ➜ “Lab resources” ➜ “All R script files” ➜ Click on the R Script file you need and download that file. [“All script files” is here](https://ttezcan.gitbook.io/lectures/all-lectures-and-labs/r-lab/lab-resources/all-r-script-files) for your convenience.
2. For example, if you need the "Descriptive Statistics" R script file. Click on it and download:
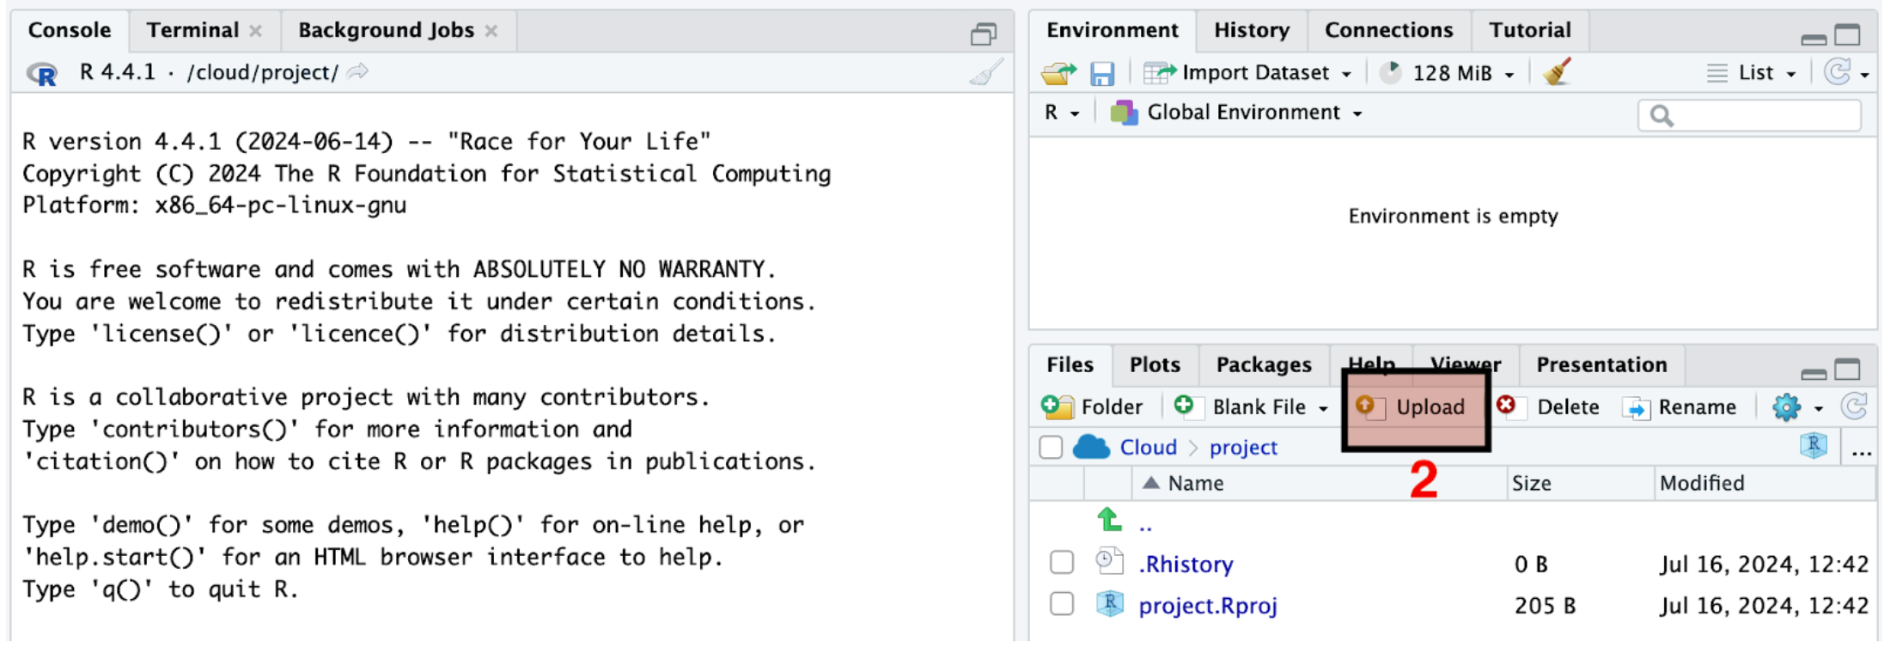
3. **Uploading R script files 1:** On [RStudio Cloud website](https://posit.cloud/), click “Upload” (see highlighted part #2 below).
4. **Uploading R script files 2:** Click “Choose File.” Find the R script file you just downloaded (script\_descriptive.R) in the previous step, click “Open” and "OK."
5. **Opening R script files:** The file is uploaded and at the bottom of the "Files" list (see highlighted part #1). When you click on it, the descriptive R script file will open (see highlighted part #2).
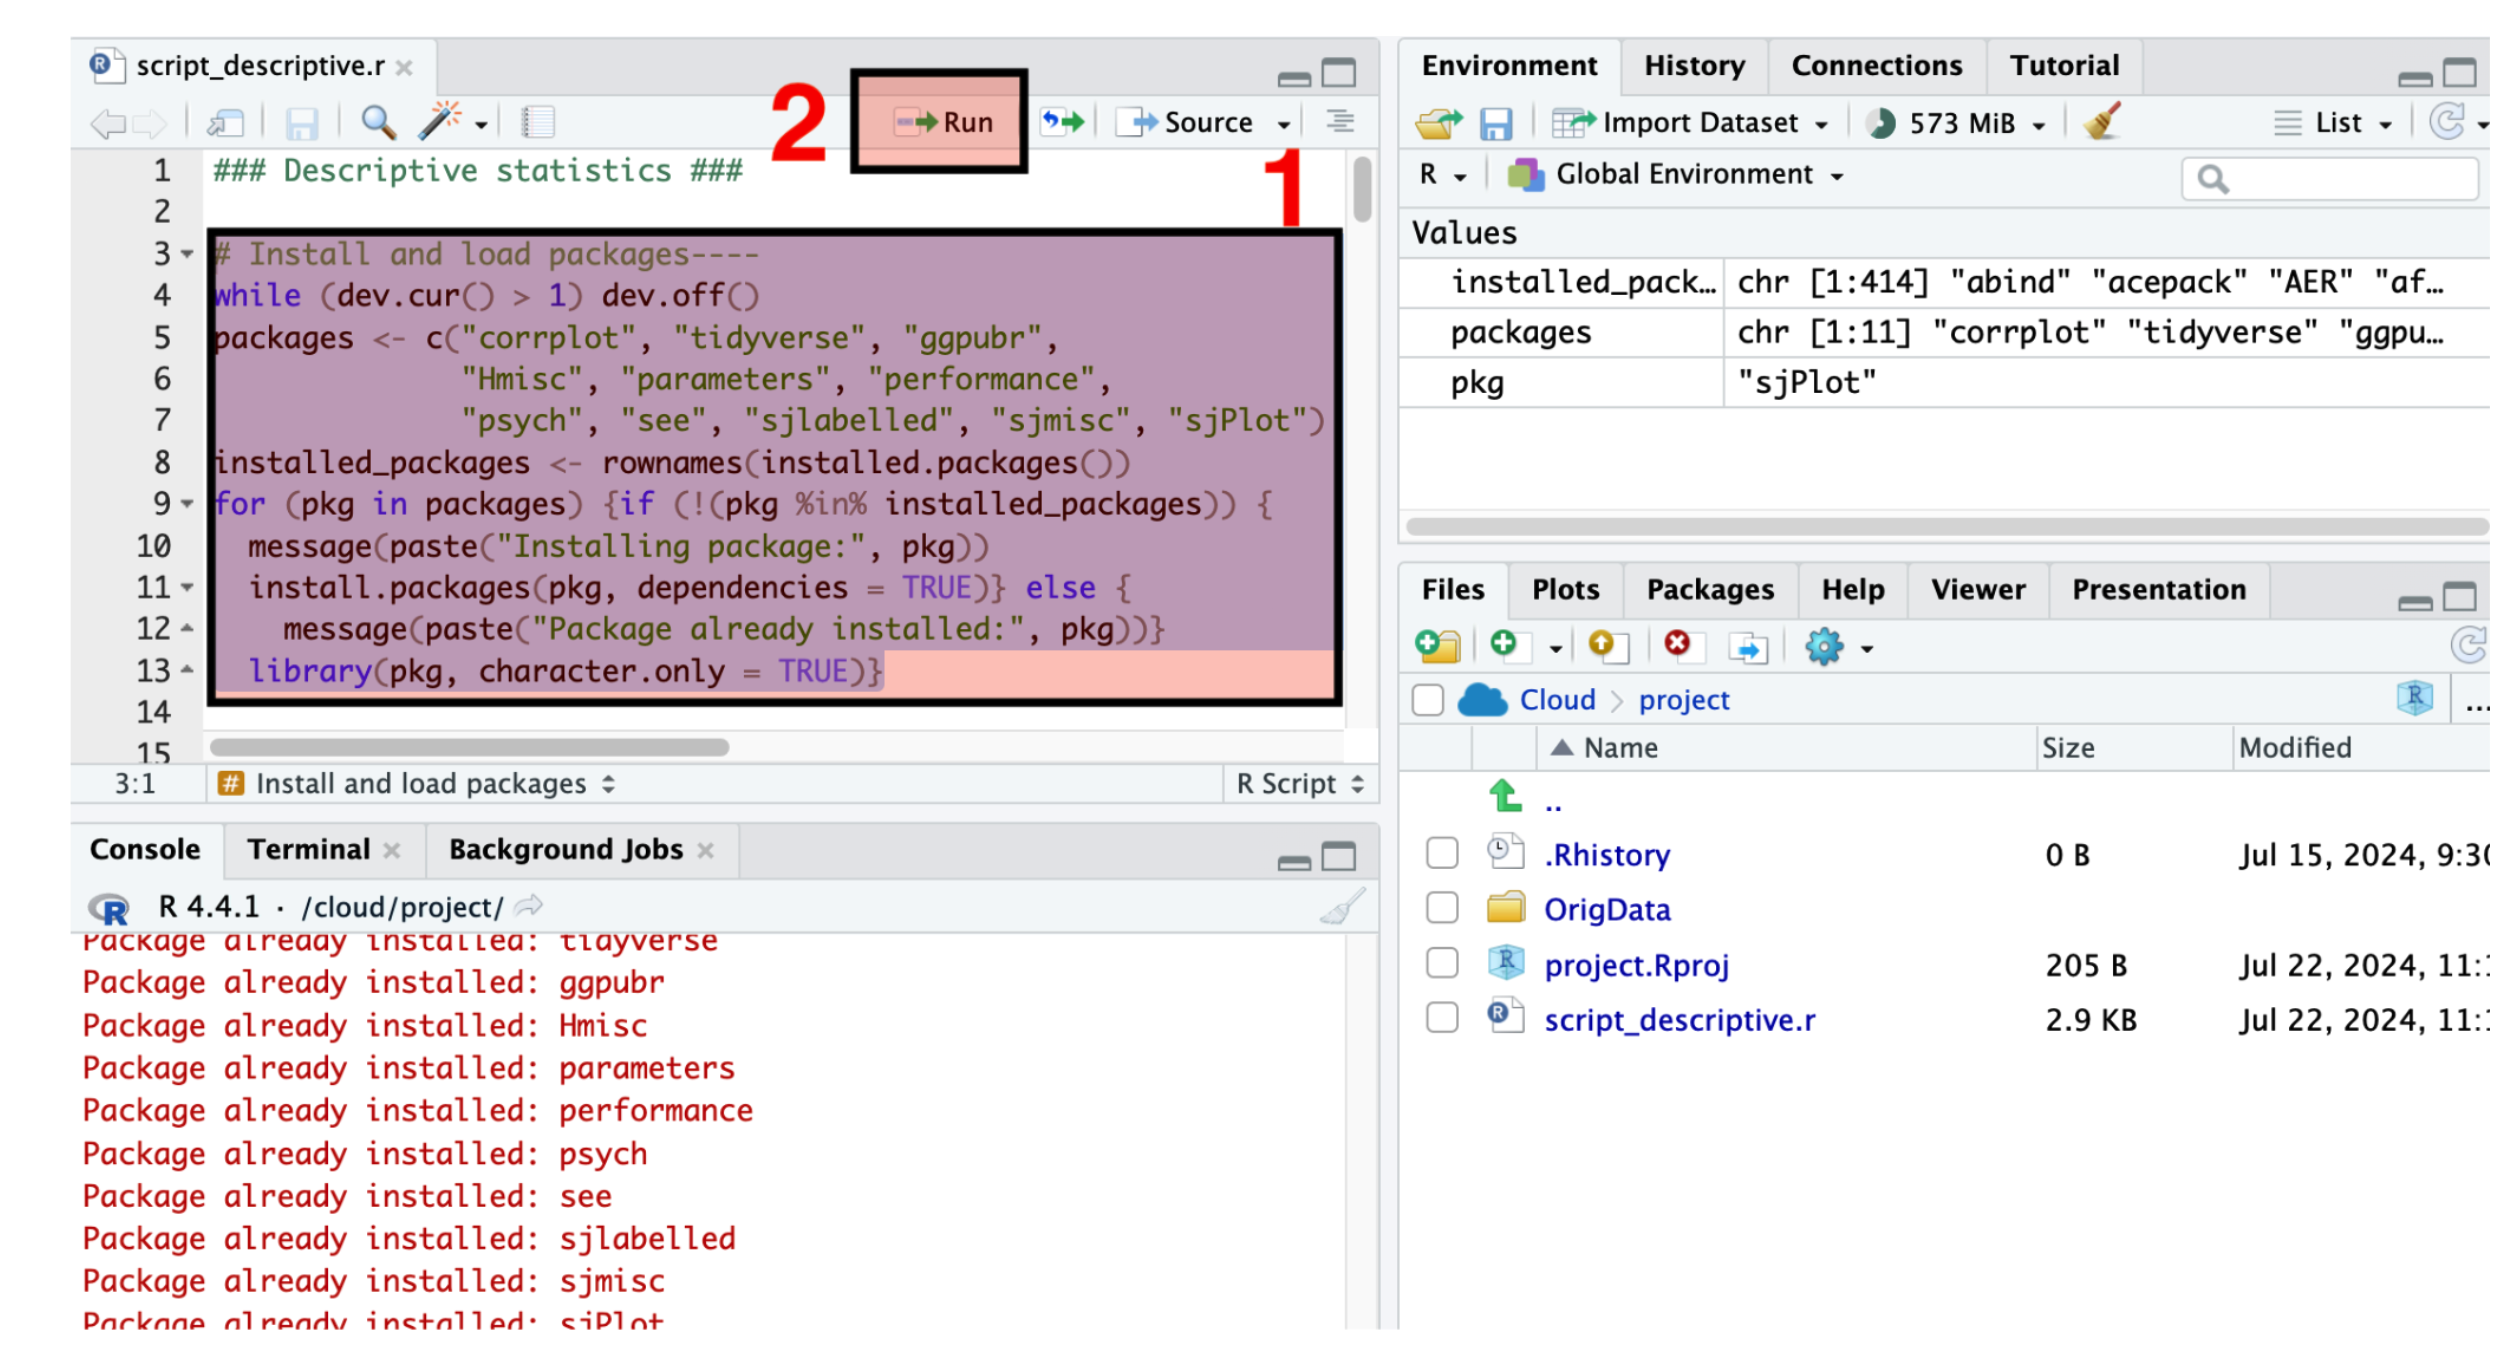
6. **Installing and loading packages:** Whenever we open RStudio, we highlight all the lines under the “Install and load packages” (see highlighted part #1) and click run (see highlighted part #2).
7. **Loading data:** When the process of installing and loading packages is completed, we highlight all the lines under the “Load data” (see highlighted part #1) and click “Run” (see highlighted part #2). When you see “gss” and “key” (see highlighted part #3), it means we successfully installed and loaded the packages, and loaded the GSS data.
8. **Running the analysis codes:** We highlight the codes (see highlighted part #1) and click “Run” (see highlighted part #2). Clicking “Run” generates the analysis (see highlighted part #3).
9. **Using R script files - “working space” and outline view:** We do not edit or change anything on R script files except under “working space”(see highlighted part #1). Anything above the “working space” is teaching material!
The codes for assignments will be put under the “working space”
For easy navigation click “Outline” (see highlighted part #2) to see the headings and subheadings.
10. **Saving R script files:** When we make any changes, the font of the file name (shown in the highlighted part #2 above) will be red with an asterisk (\*) - (see the highlighted part #1 below). To save our progress, we click save (see the highlighted part #2 below)